Most people, probably, are in doubt about certain matters ascribed to their past. They may have seen them, may have said them, done them, or they may only have dreamed or imagined they did so.
William James
There are two main themes that I want to address with this project:
Memory - both formation and invention
Environmentalism
Both of them will work closely together and inform each other in this context, but I will discuss Environmentalism first.
Environmentalism and Environmental Protection have been existing issues for my entire life. I haven't lived in a time when man's impact on the earth has not been discussed - whether it was Greenpeace and Saving the Whales in the '80s, Rainforest destruction in the '90s, or Global Climate Change in the new Millenium.
Sadly, environmentalism has become a political issue in the past decade. A few days ago I heard on the radio that the National Center for Science Education (a group that monitors legislation and school board activity that is threatening to science education) has decided to include Global Climate Change under its protection. Some students, parents, and supervisors have begun treating the role of human activity in climate change in the same way as evolution: an offensive theory that must have an alternative version taught in science classes.
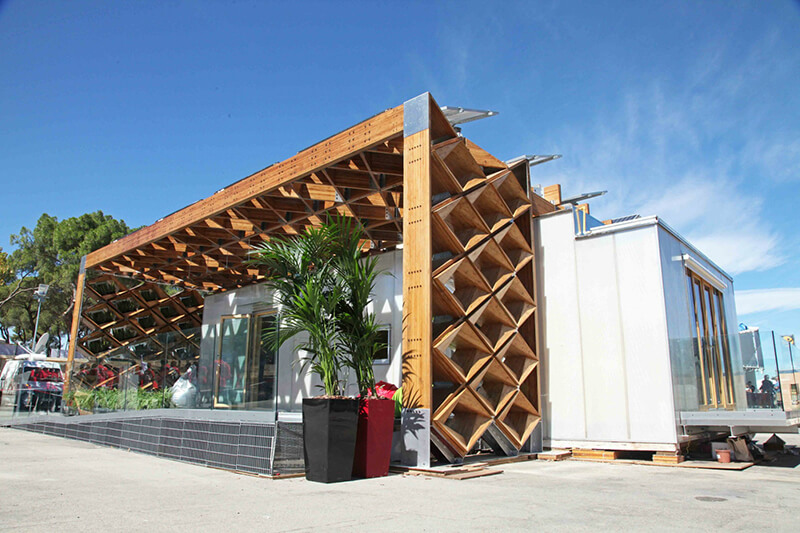
However: those that don't view the Earth with this attitude are also fighting back - through legislation, everyday actions and even buying choices. "Green" is in: from cars, to clothes, to architechture.
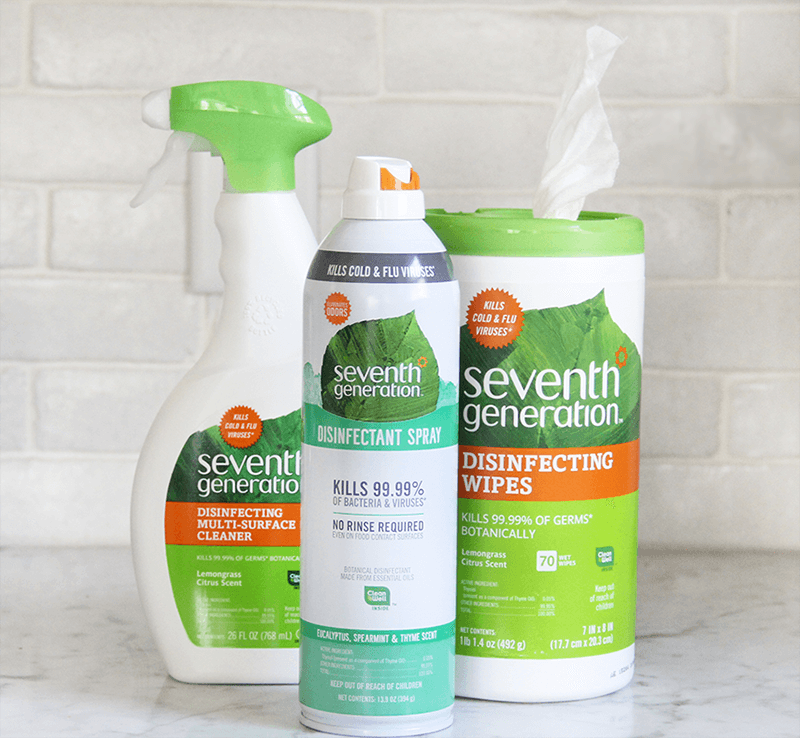
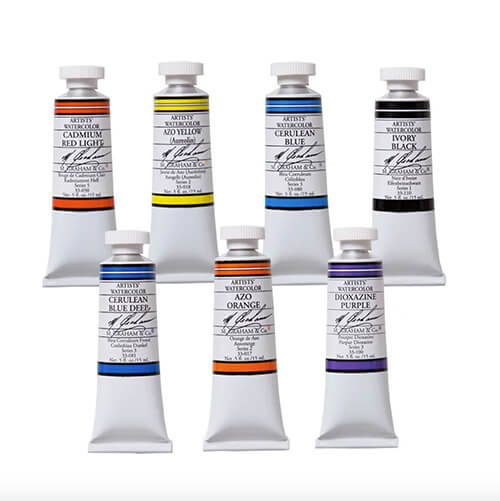
Green Products
Luckily for this project, the keeness for Green has been extended to art supplies as well. It wouldn't make sense to craft romantic landscapes of a pristine Earth of the past if I'm contributing to environmental problems today. It was a major worry for me because it's important for the process to fit the theme...and the folks at my local art store hadn't heard of recycled watercolor paper.
Fortunately I've been able to find some interesting possibilities:
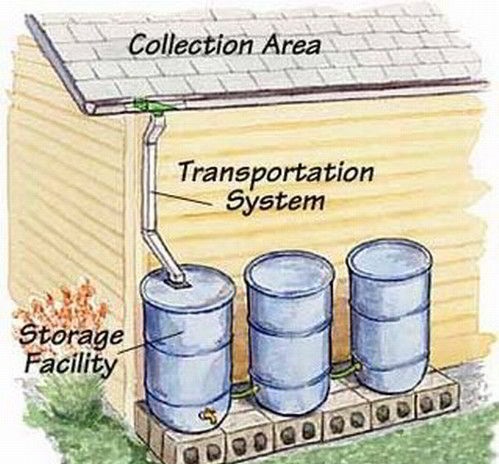
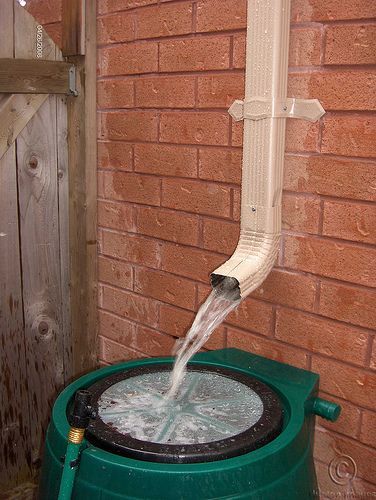
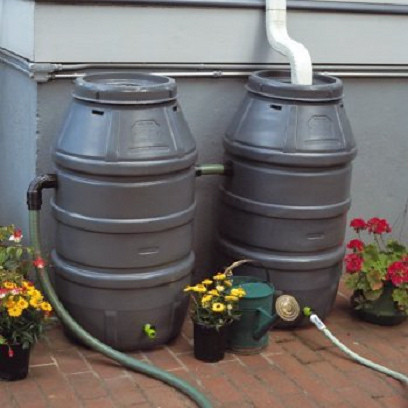
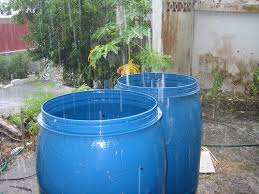
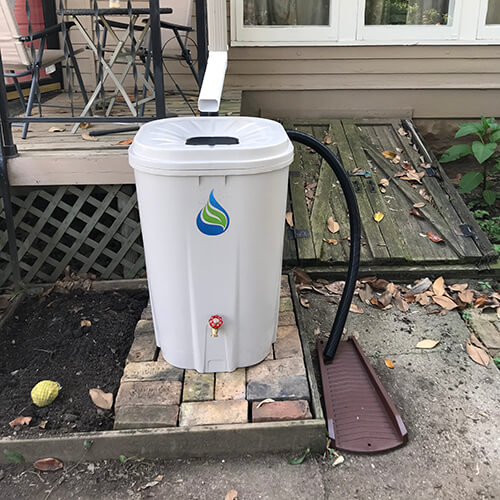
To cut back on the amount of treated water I use to rinse prints, I'd like to build a rainwater collection system. It might not collect a great amount of water now, but in the springtime I hope it will be more productive. (Likewise, with the UV light needed to expose my prints: Hopefully I will be able to use mostly natural sunlight as the weeks go by - and will only have to use my UV exposure unit on a few occasions.)
Rainwater Collection
With my mind set at ease regarding the environmentally appropriate nature of my supplies, I can focus more on the other theme: Memory.
I need to research further the phenomenon of inventing memories. Or, at least embellishing them as time distances us further from the incidents and locations of our lives. It is the idea of looking back on locations and romanticizing our memories of them that made me decide to use the Gum Bichromate process in the first place.
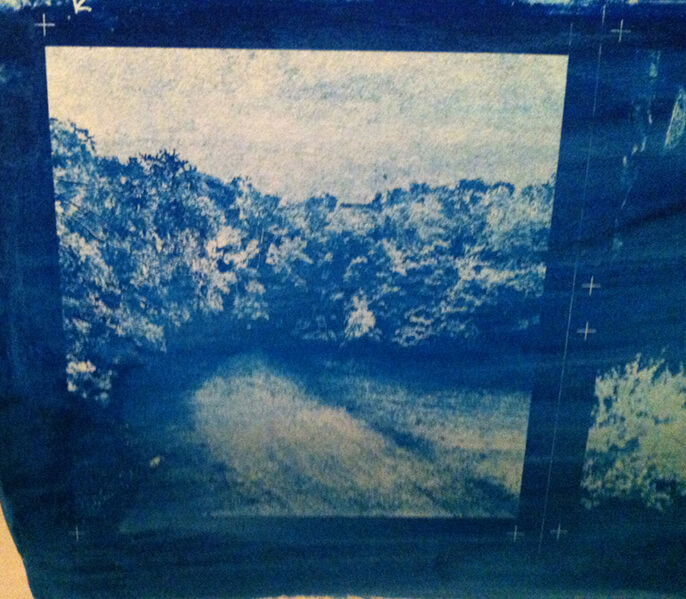
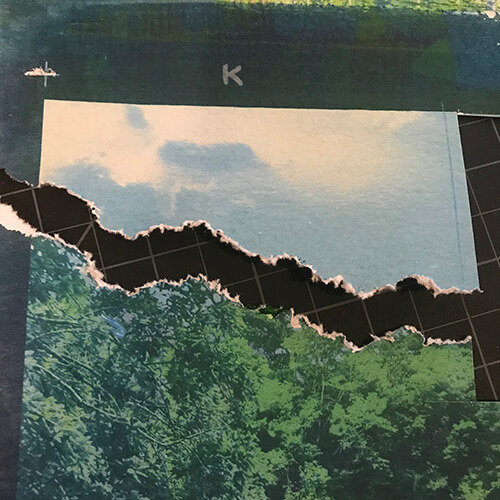
In the >Gum Bichromate process, watercolor pigment is blended with gum arabic. The resulting pigmented gum is combined with a solution of light-sensitive chromium salts and this emulsion is then brushed onto the surface of paper that has been sized. When an exposed gum print is submerged in water, the emulsion - including the orange chromium solution - remains attached to areas that were exposed to UV light.
Because of their use of watercolor paints, gum bichromates will enable me to layer on as many bright colors and saturate the image as much as I want. (Just as our senses/colors become more intense/brighter in our memories.) Using Photoshop to collage together digital images will allow me to create landscapes that are truly my own...pieced together from places that I have been in my life.
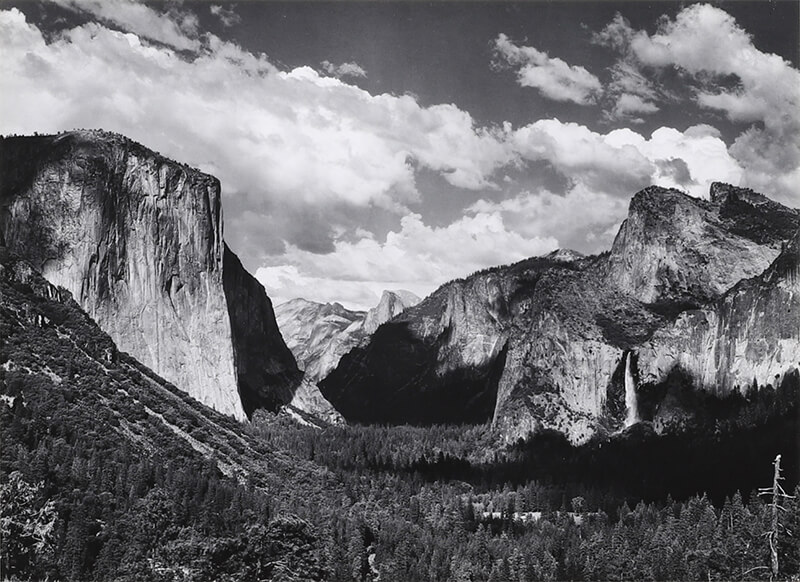
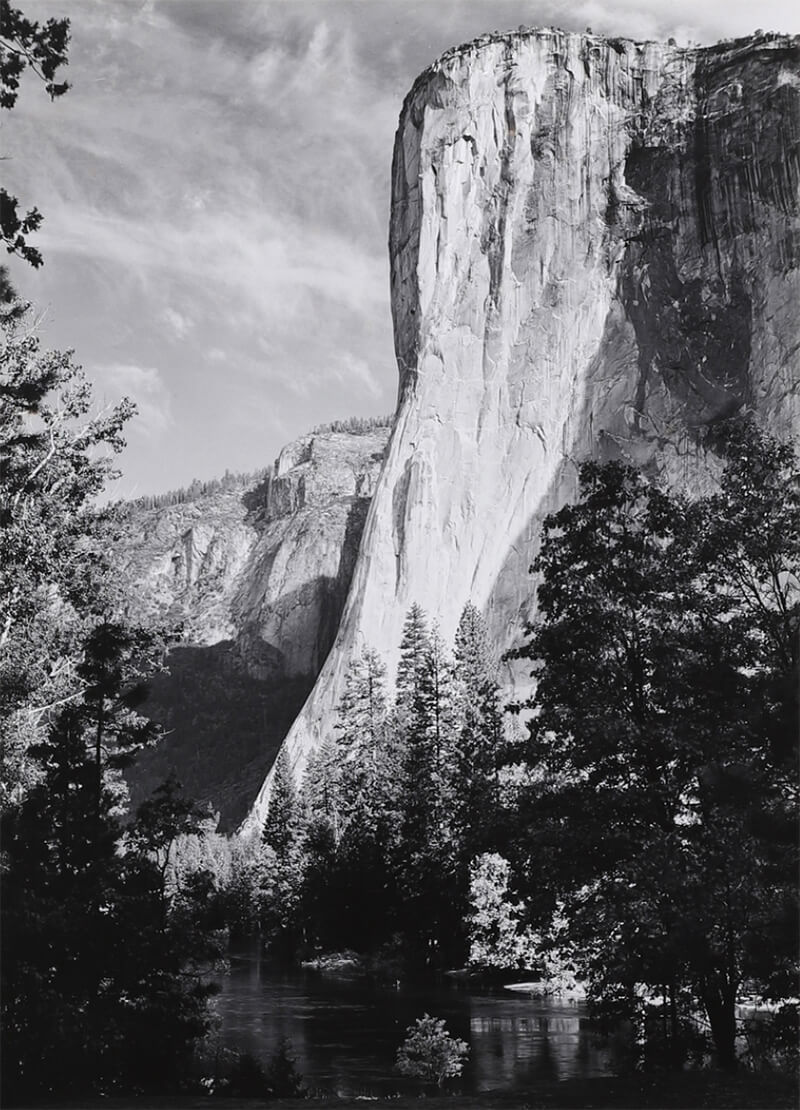
It would be impossible to undertake a photographic landscape project without studying the master of landscape photography. Although his style is more documentary, I can learn much from his impeccible craft and the grand vistas he portrays.
1. Yosemite Valley from Inspiration Point • 2. El Capitan, Morning
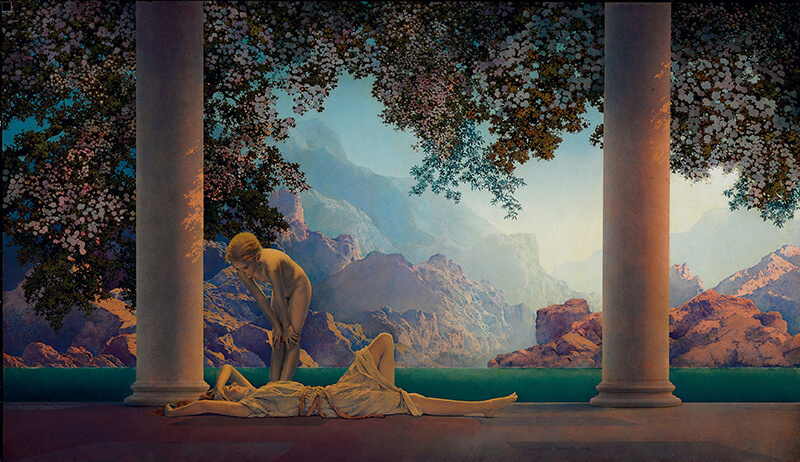
Maxfield Parrish
Parrish's illustrations appeared in children's books, periodicals and advertisements over the first half of the 20th century. His paintings often show characters in fantasy lands - and it is those landscapes that I am most interested in. They're dreamlike, detailed in perspective, and gorgeous.
1. Morning Light • 2. Daybreak
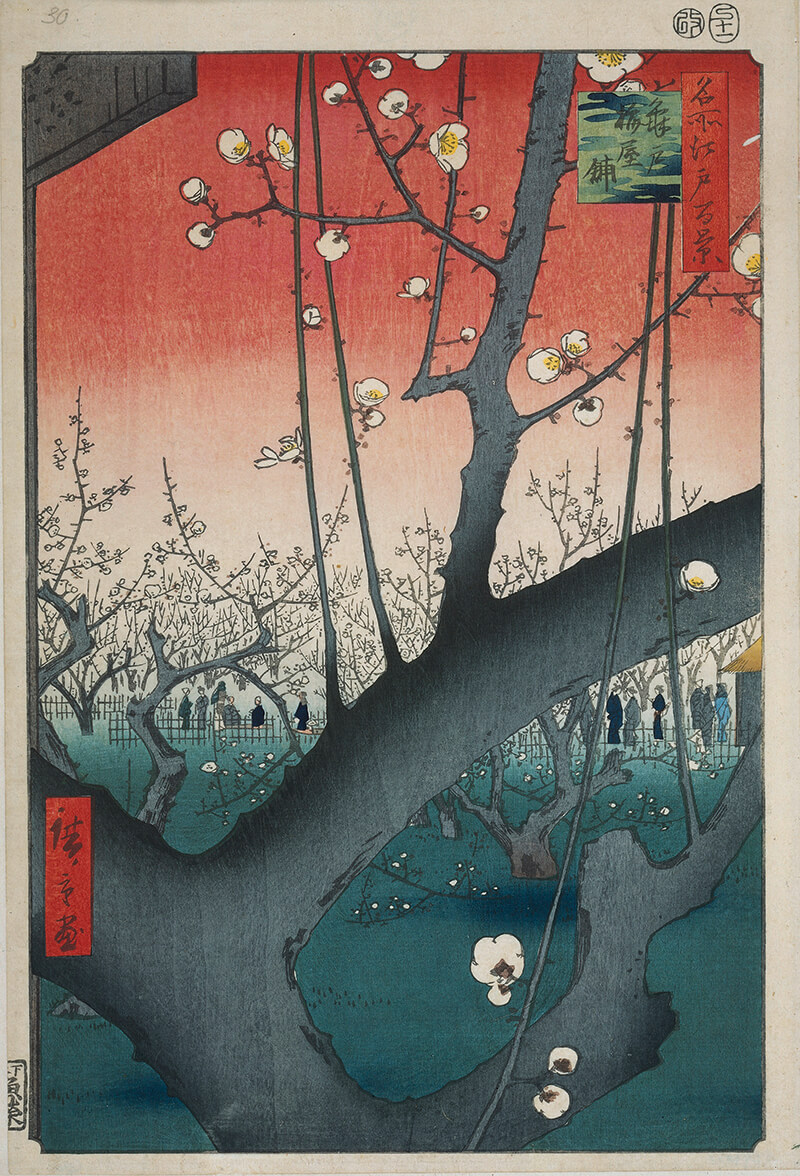
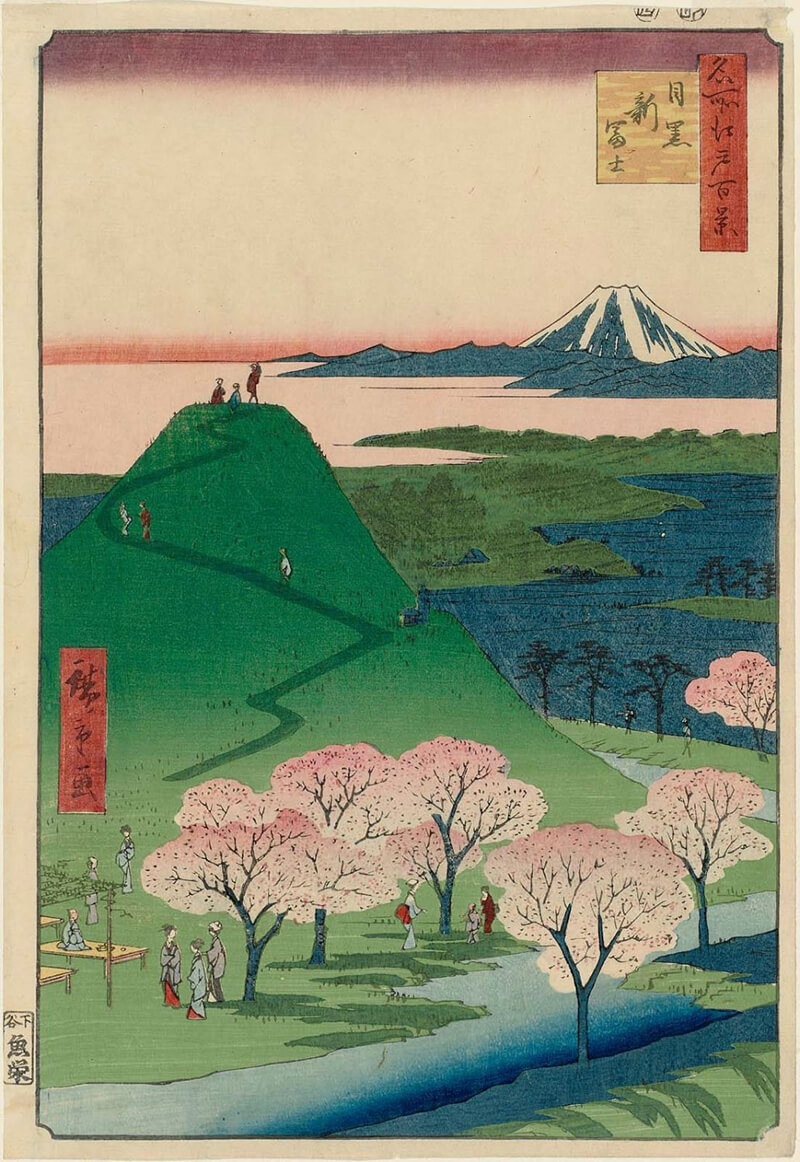
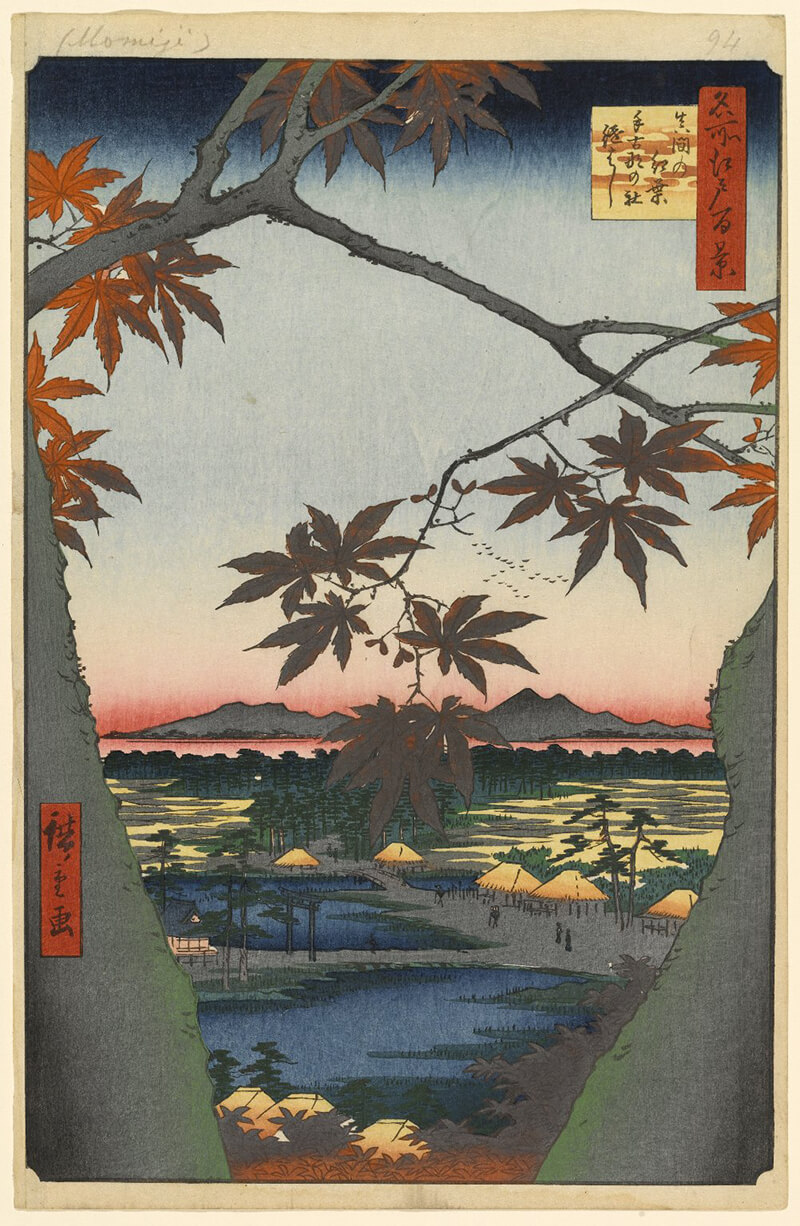
Utagawa Hiroshige
This Japanese ukiyo-e artist lived and worked in the first half of the 19th Century and created a series called "One Hundred Famous Views of Edo" that has especially inspired me...not only because of his use of vibrant colors, but also his compositions. Hiroshige pays as much attention to the foreground of his prints as he does to the middle and background.
1. The Plum Garden in Kameido • 2. New Fuji, Meguro • 3. Maple Trees at Mama, Tekona Shrine and Linked Bridge
The concept of Fate is a bit tricky. At times the thought that certain things are meant to happen can be comforting - at other times it can seem restrictive. Perhaps "serendipity" would be a better word to use for recent events - or at least a word that doesn't carry a lot of conceptual baggage. It's about luck, not predestination.
The laptop that I have used to edit photography and create art for the past 8 years has finally died. It had been struggling for the past year but I didn't want to let it go. It was a great Mac PowerBook G4 and it had seen me through the Graphic Design and Photography program at the University of Louisville. But finally the logic board died and all I was left with was the hard drive. In a way though it felt appropriate for it to die on this project - sending the laptop body off to be recycled seemed fitting.
It still left me without a computer to edit my landscapes. I work extensively with Photoshop at my day job and I likely could have used my work computer on the weekends, however the idea of spending more time at a place I already devote 40 hours a week to seemed stifling. But my workplace indeed came to my rescue, although in quite a different way: The very day after I said goodbye to my laptop - and without even raising the topic of my dead computer - my manager asked the team if we would be interested in taking home any of the old Macs that were sitting around the office. We had recently upgraded to new machines. The old ones are slower but still perfectly useable. They still belong to the company, but my manager assured me that no one would mind if I used it to work on my own artwork in addition to company-related work. An ideal and serendiptously immediate solution to my problem!
In order to artistically explore the concept of how human memory can become exagerrated or distorted over time, I need to educate myself as to how the brain accomplishes these feats. Here's what I've learned so far:
Scientists still are not 100% sure how memory works (!!!) However, they think that it's not located in one particular place in the brain, but is a brain-wide process with different types of memories coming from different parts of the brain
Memory begins with a perception - experienced by your senses and encoded if the brain thinks they're worth remembering. Scientists think the Hippocampus and the Frontal Cortex are responsible for encoding analysis. Once analyzed, it is stored in either Short Term or Long Term.
Long Term Memory can store unlimited amounts of information indefinitely.
MRI studies have shown that the same parts of the brain are used when remembering the past as when imagining a similar scenario in the future. So past memories are accessed and drawn on when projections are made. This is called Mental Time Travel as it allows us to project ourselves at will either backwards or forwards in time within our personal lives.
Scientists have divided types of memories into many distinct categories. The type of memories I'm interested in for this project are classified in this way:
Long Term Memory
Phase or type of memory responsible for the storage of information for an extended period of time.
Declarative / Explicit Memory
Memory of facts and events that can be consciously recalled.
Episodic Memory
Our memories of experiences and specific events in a serial form. Emotional charge and context surrounding an event is usually part of this memory.
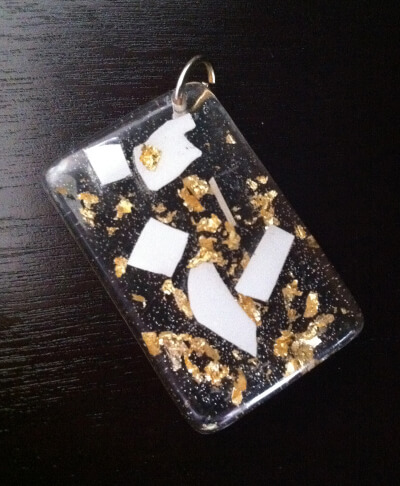
For Christmas 2 years ago, my boyfriend's roommate, Kelly, gave jewelry to her friends that she had made out of resin. I watched her makes some of the pendants and earrings and was fascinated by the process. The resin was clear and flowed easily into the jewelry molds after all the ingredients were mixed. She then added found objects into the molds and allowed it to set. She then poured more resin into the mold to fully embed the objects. What I liked best about the necklace that she made for me was that it contained memories.
Once, while in their apartment, my boyfriend was cooking something in the oven. As he opened the oven to look inside, somehow the door sprang shut, causing the glass of the door to shatter everywhere into hundreds of tiny pieces. It was quite the cleanup - and I thought we had thrown all the glass bits away - but imagine my amusement when I saw gold leaf and broken oven glass made into a beautiful necklace for me to wear!
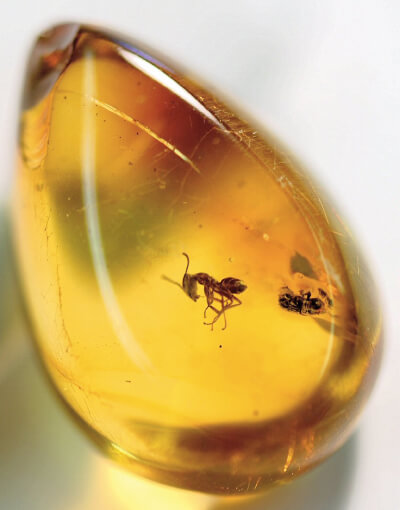
The embedding of meaningful objects reminded me of fossils or the tiny bugs that become stuck in amber. I began to see this encasing of objects in resin as a physical representation of the storing of memories in the brain. The resin must be layered slowly to secure whatever object is being embedded - just as our brain forms a memory from different layers of sensory perception. For the resin to move from liquid to solid, different ingredients must come together, just as different areas of our brain work together to solidify or encode a memory.
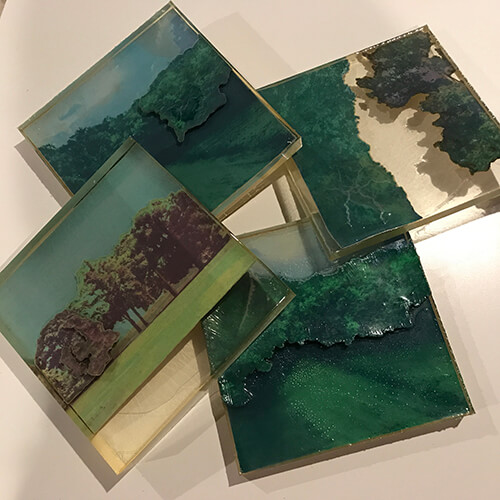
Could embedding my Memory Landscapes in resin, like artifacts or fossils, be the perfect final presentation method? It feels correct and makes sense to me, however I've never worked in resin before and there could be unforseen obstacles in adapting this process to include Gum Bichromate prints.
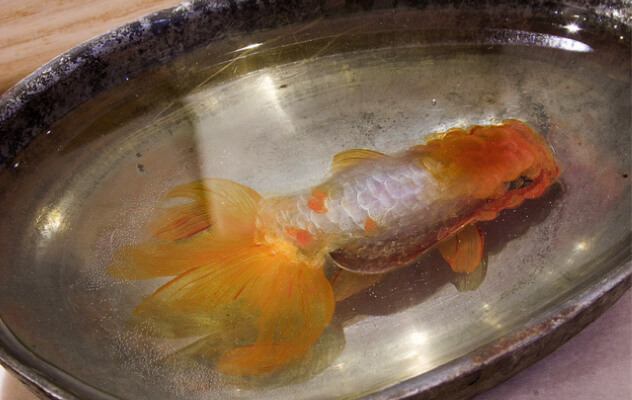
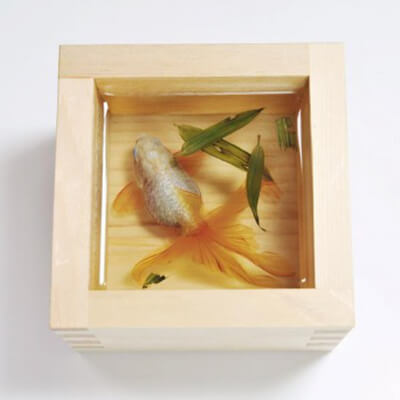
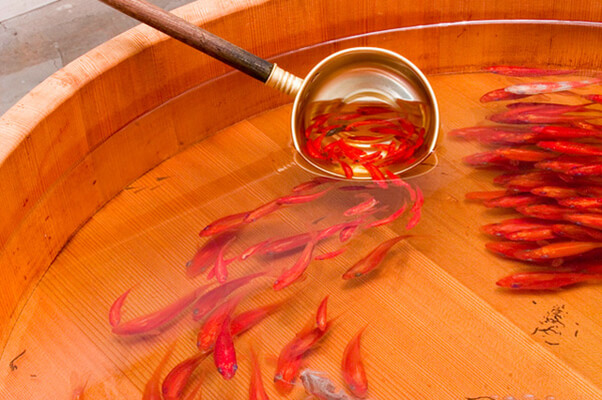
Riusuke Fukahori
Japanese artist Riusuke Fukahori paints three-dimensional goldfish using a complex process of poured resin. The fish are painted meticulously, layer by layer, the sandwiched slices revealing slightly more about each creature, similar to the function of a 3D printer.
thisiscolossal.com
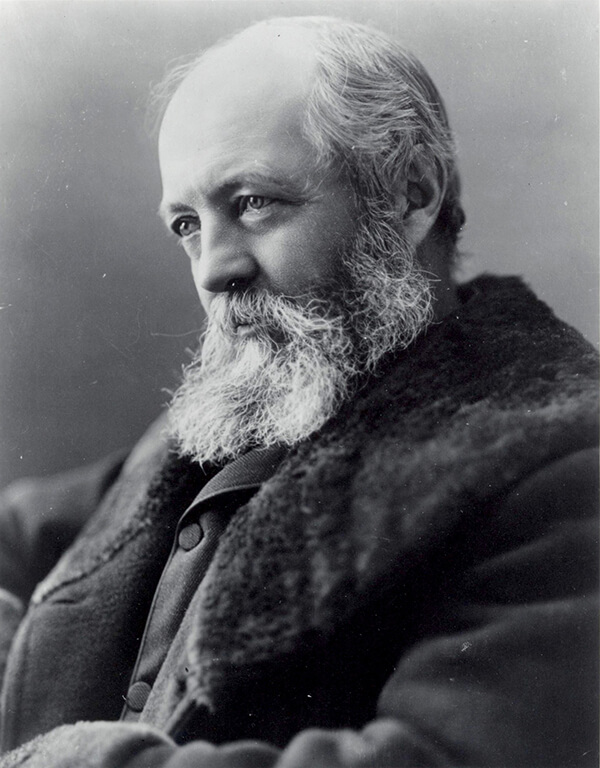
While reading Erik Larson's excellent book, The Devil in the White City, I was made aware of the contributions and personality of a man considered to be the father of American landscape architecture: Mr. Frederick Law Olmstead.
I had heard his name before, particularly in regards to Louisville's own park system - especially Cherokee Park, which I live less than a mile from and run through frequently. However, I never considered how this man - who created beautiful vistas out of real trees, plants, and earth, could be an inspiration to my own work in creating digital landscapes.
Olmstead struggled to have landscape architecture viewed in the same high regard as the architecture of buildings. He bristled at the notion that his work was "glorified gardening". His first major project was New York City's Central Park and he spent the rest of his life building parks all over the country that connected nature to - and sometimes coexisted with - urban environments. (Although the ways they were tended and altered by others over time was a constant source of annoyance to him.)
He was plagued throughout his life by ill health and poor eyesight. In 1898 senility forced him to become a patient at McLean Hospital in Belmont, MA, for whose grounds he had served as a consultant when the hospital site was initally chosen.
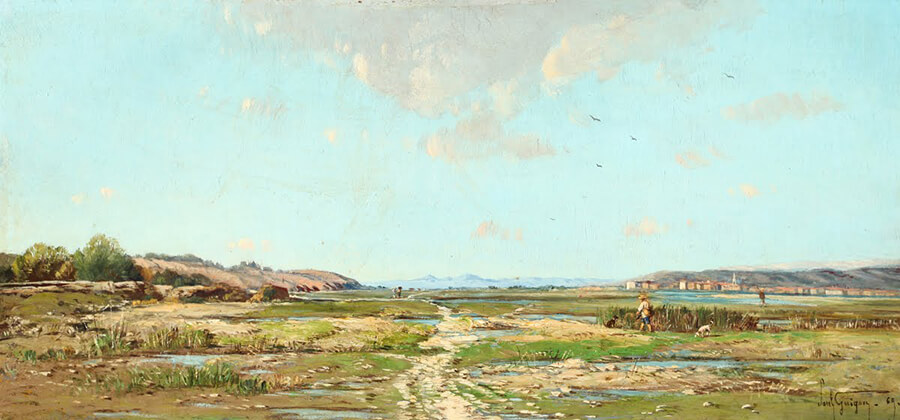
Paul Camille Guigou
Seen at the Speed Art Museum's Exhibition "Renoir to Chagall: Paris & the Allure of Color"
The composition of this pastoral scene appealed to me. The proportions are close to symmetrical, however the artist is unafraid to devote a larger portion of the canvas to a beautiful expanse of sky, while relegating the usual objects of interest: hills, trees, buildings - to the middle or background.
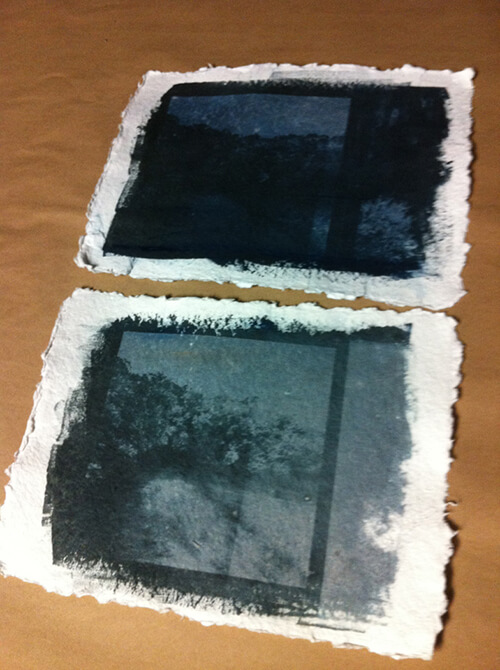
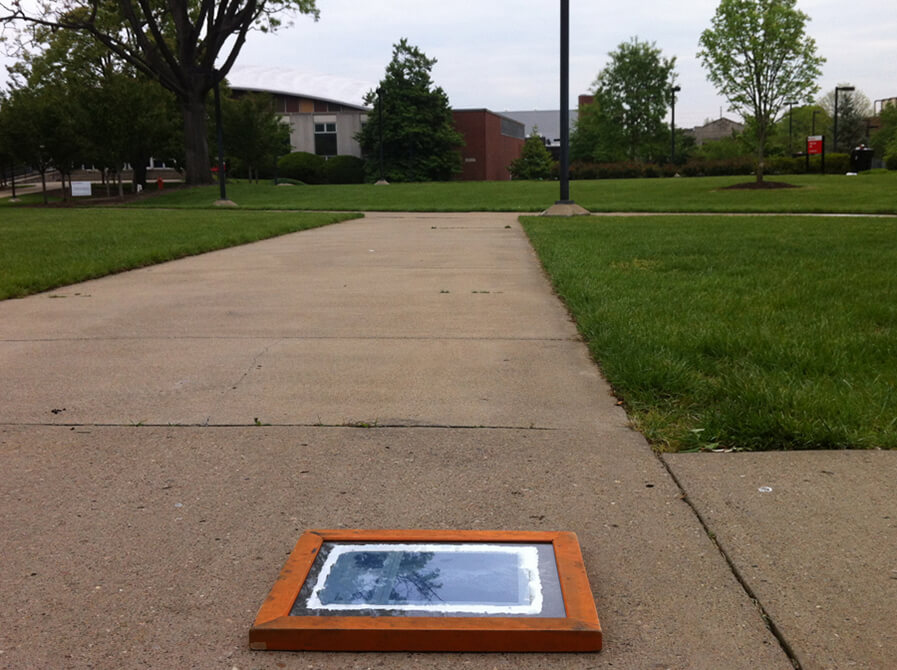
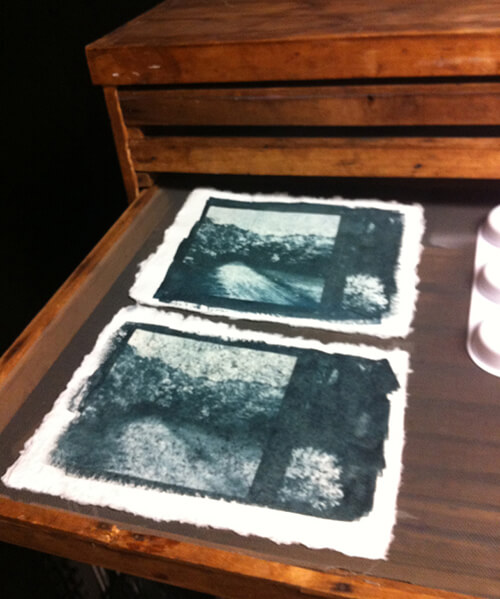
It certainly felt strange to be back in the darkroom. A little intimidating even, especially since Gum Bichromates had given me so much trouble in the past. I wanted everything to go smoothly, to give me the confidence boost I desperately need - but at the same time, I know I can't expect immediate perfection after such a long break...
Spring 2012 Directed Study at the University of Louisville
Well things didn't go perfectly, but through trial, error, and good note-taking, I was able to improve over the first 2 print days.
I learned that sizing the recycled paper is a MUST, that not all the sheets are equal in quality, and that a weaker bichromate solution is best.
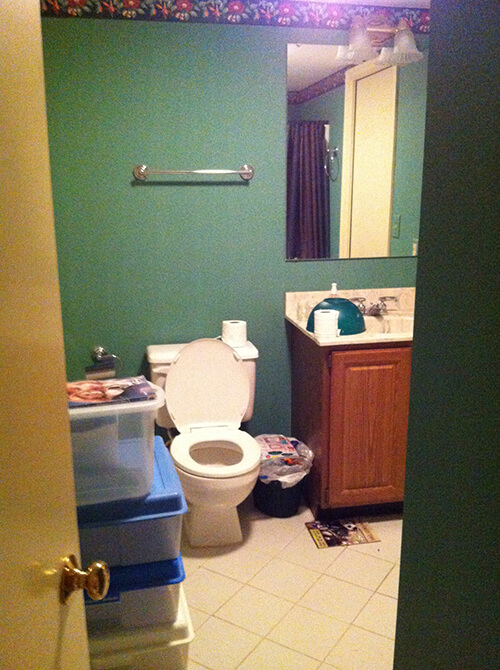
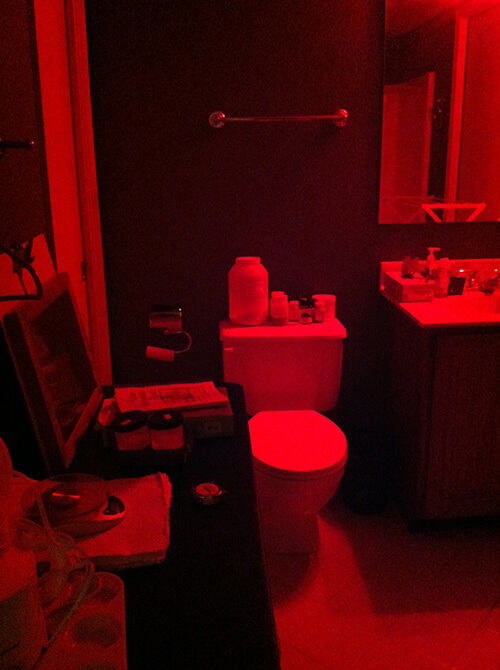
Setting up my own Alt-Process Darkroom at home
Before: Unused bathroom, cluttered with storage
After: Private Darkroom!
Sink: Good for cleaning paintbrushes
Cabinet vanity that doubles as a place to dry paper after it's been coated
Shower: Great place for rinsing prints and pre-shrinking paper
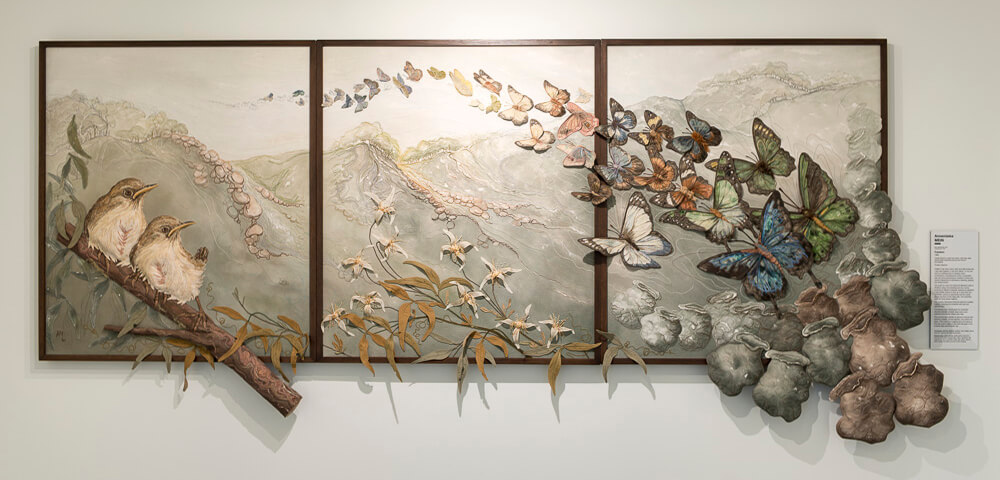
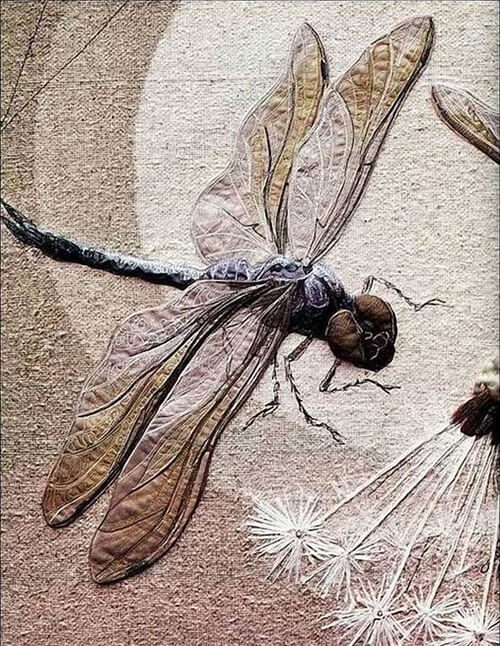
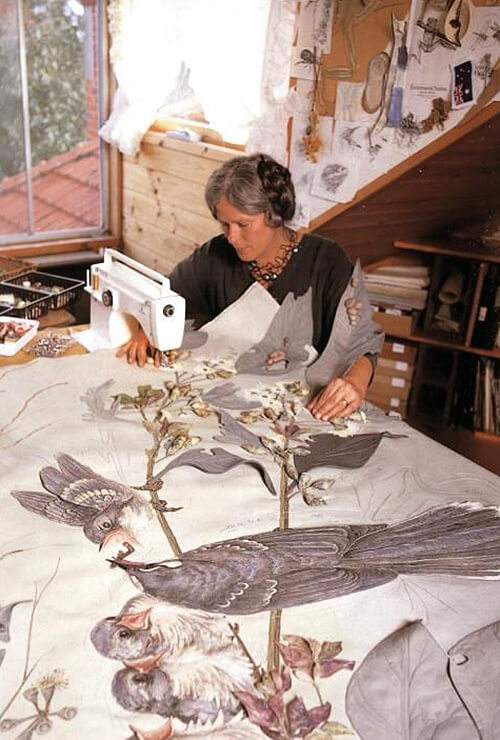
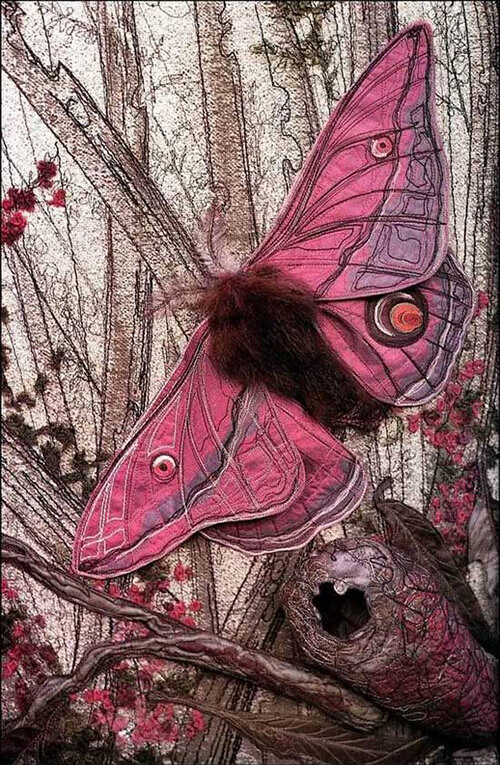
Dutch-born Australian textile artist whose work centers around wildlife - particularly invertebrates and their environments. She portrays them larger than life in an effort to open a window to the "beautiful, fascinating and mostly unseen" (Charles McCulbin).
I admire her meticulous methodology. She carefully observes, documents and draws the biological details of her subjects for weeks beforehand. Specimin collection, breeding and life cycle observation help inform her portraits.
Mein aims to make people aware of the relationship between humans, the environment, and native species through textile sculptures, wall hangings, and wearables. Some details are sewn, painted than sewn, and layered with thick and thin fabrics to portray perspective.
1. Detail from "Dragonflies" • 2. Mein at work • 3. Detail from "Pink Emperor Gum Moth II"
After many attempts and unreliable results, I have been forced to accept that the Shizen paper is NOT the right choice for this project. I was never in love with the texture, but the deciding factor was the mottled, splotchy look that some of the sheet had after exposure, despite the fact that all of the paper was preshrunk and sized at the same time and in the same way.
However, I've found the perfect alternative in a student-grade watercolor paper made by Jack Richeson. It's made from 100% post-consumer recycled waste, is 135lb cold press and can be bought in a bulk pack of 110 sheets for $30! The texture and performance is miles better!
Thankfully my aunt, Beth Hammer, already has a rain barrel installed at her house and is willing to share her rainwater with me. Now I don't have to budget for and install my own system. During the less rainy months I've been supplementing that with water from a nearby creek in Brown Park. I collect it in a tub, then bring it home to filter before use.
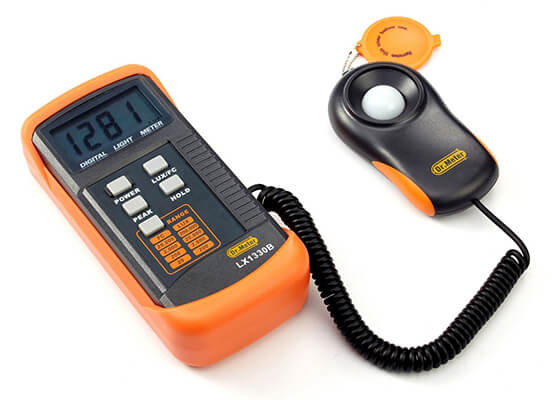
Gum Bichromate has always been a tricky printing process for me. There are so many variables! Formulating the strength of your sensitizer, finding the right Gum Arabic, knowing how these elements interact with individual pigments...it's a lot of trial and error. (So far I've made all of the errors.) And using an inconsistent light source - the sun - has NOT made things any easier.
Over the past year of working in this process I have learned a few things. Most importantly: a light meter is a must. Why did I waste my time blundering through exposure after exposure without one? Guessing how long I should expose prints based on vague notes I had made about the weather was a recipe for frustration. Maybe someday I will have that kind of knowledge, but until then I decided to invest in a Digital UV Light Meter that was affordable and gives an actual number reading off of which I can base my exposure times. This caused me to have a breakthrough: For the Gum Bichromate work I'm doing, I prefer the results I get when I expose in lower light for longer periods of time instead of the other way around.
Before embarking on my own adventure in resin, I sat down with Kelly Dunnagan (maker of resin jewelry and all-around cool person) to get some advice about the process.
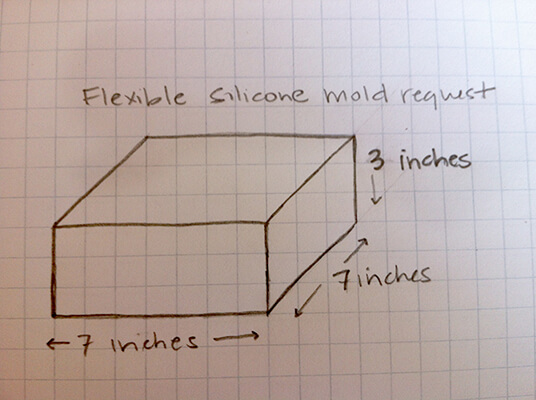
To have ANY chance of removing a finished resin project from its mold, the mold itself needs to be made out of a flexible material, like silicone. Thanks to Kelly's advice, I scrapped the idea of trying to make my own silicone molds. She pointed out that every little imperfection in my casting materials would transfer to my silicone molds...which would eventually show up in my resin piece. After talking it through with her, I agreed: This wasn't the skill I wanted to focus on with this project. To save frustration, I decided to outsource this task to a professional.
Kelly Dunnagan
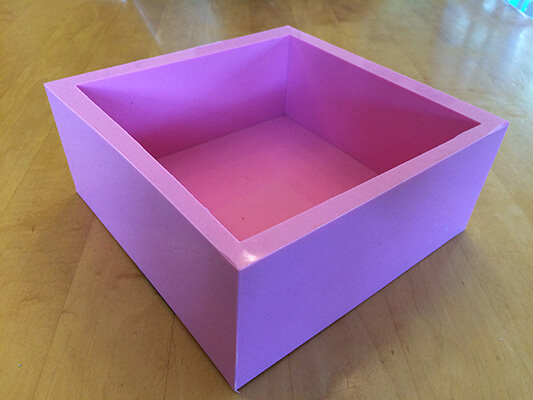
Some internet research quickly led me to a company called Chase Creative Molds that specializes in flexible molds for soap and candy making. I sent them a drawing of what I wanted, talked on the phone with a consultant and within a few weeks I had exactly what I needed!
Once I had the molds and located an environmentally appropriate resin, it was time to being the next phase of the project. I calculated the amount of resin I would need for the first layer and mixed it according to the product's instructions. Kelly had warned me about air bubbles becoming trapped in the resin and had given me tips to avoid them. I had also watched resin videos online so I felt well prepared for my first pour.
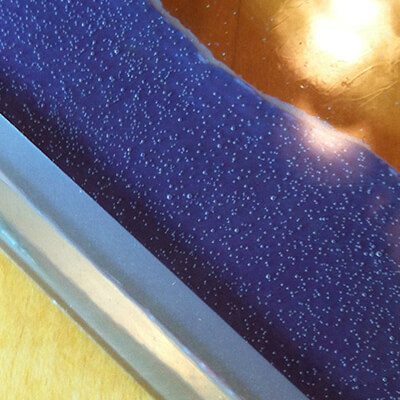
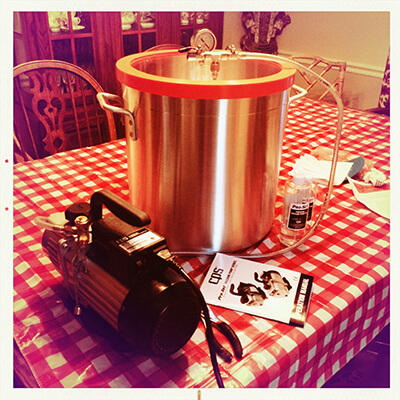
My confidence loves to play tricks on me! My first pour turned out as bubbly as New Year's champagne. The sheer amount of resin I was pouring was going to make it difficult to use the tips that I had learned from Kelly and other resin videos on YouTube. I didn't want to waste materials, time, and most importantly: precious prints. So I decided that it was time to invest in a Vacuum Chamber to suck the air out of my resin and remove all of the bubbles.
Lots of tiny air bubbles • 10 Gal Vacuum Chamber
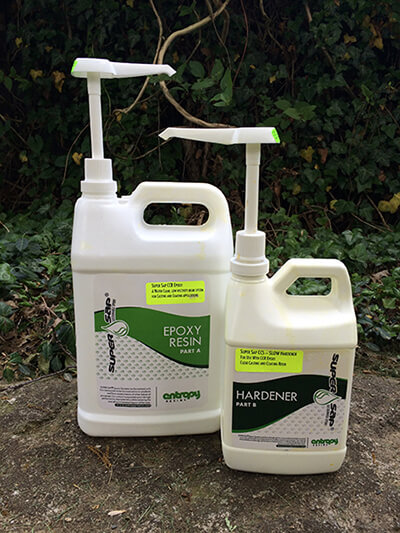
Entropy Resins
Entropy is a California-based company that produces bio-based epoxy with a lower environmental impact. By employing green chemistry techniques that require less energy and produce less harmful byproducts. They've reduced their greenhouse gas emissions by 33% compared to conventional petroleum-based epoxy production.
Entropy replaces petroleum-based carbon with renewable plant-based carbon. The raw materials going into the resin are co-products or waste products of other industrially important processes.
(Mis)Adventures in Resin - A Reintroduction to this project
October 2018
This project is certainly taken longer than I expected. It’s been years since I’ve dedicated time to this work. There are lots of reasons why - going through the process of buying a house, problems with the resin process - it’s all been very discouraging. And while I still love the idea of this project, I haven’t wanted to work on it since I ran into so many process problems and life distractions.
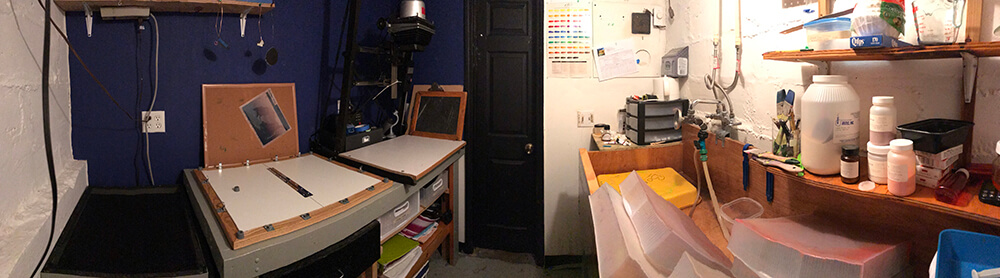
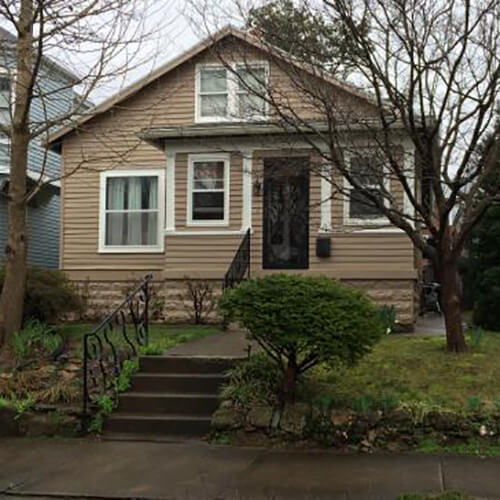
But today is a new day: and after searching for two years for a house with an unfinished basement that I could build a darkroom in - I now have a house: that already has a darkroom in it!
Darkroom Panorama
There’s plenty of room in this basement for me to set up my enlarger, my UV exposure unit, my vacuum chamber and store all of my supplies. There’s also a backyard where I’ve set up a rainwater collection barrel. I’ve taken some time off from this project - and beaten myself up for it. But life happens and it’s time to forgive myself and move on.
So I’m getting back to it: Mixing chemicals, filtering rainwater, sizing and coating new paper and starting all of my prints from scratch.
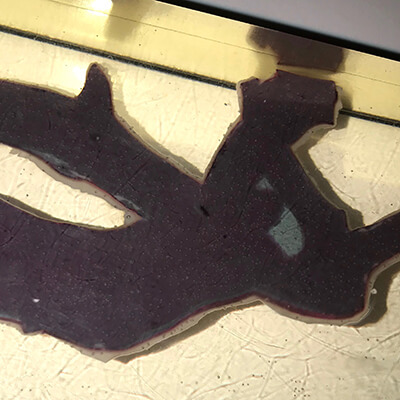
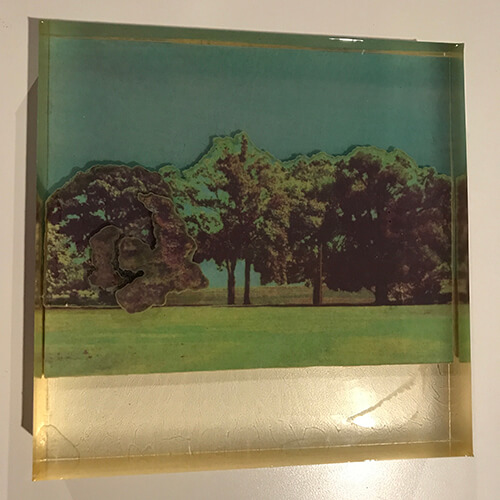
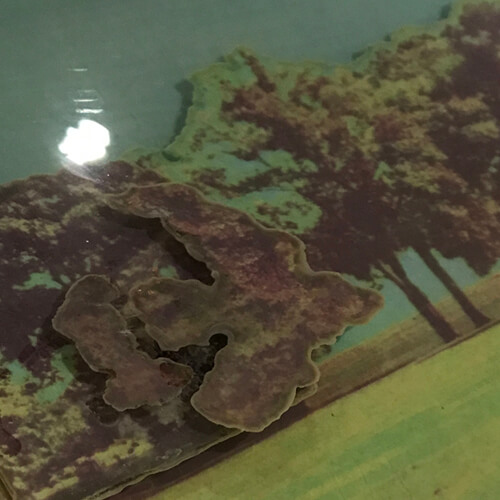
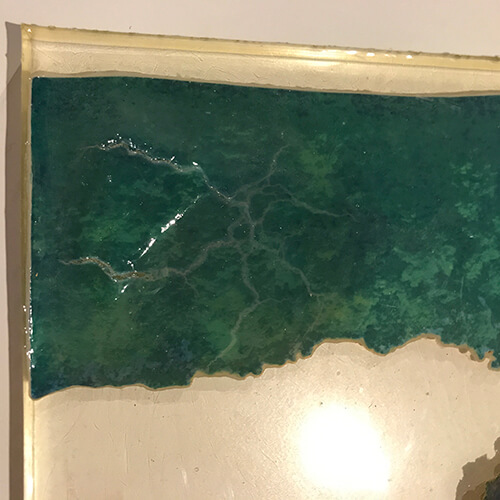
The reason why I’m starting all of my prints over is because I’ve realized that resin is not the best material for this project. There are so many wonderful things to do with resin - and I still want to use it some day for a project. However, embedding paper in it has proven impossible. The resin had a tendency to leech into my prints and make them look blotchy. Even when I coated them in sealant, they would either turn splotchy, or the sealant itself would react with the resin to make it look cloudy or clumpy. The act of pouring the resin was also finicky and the amount of time it would take for the resin to set before you knew whether or not you’d had a successful pour - or messed up weeks of work - was prolonged. Simply put: it is a fascinating material and I know someday I'll find a project for which it will be perfect - but it’s not ideal for embedding gum bichromate prints. And every failure I was having was making me want to work on this project less and less...until I wasn’t working on it at all.
Attempts at sealing prints • Problems with print/resin interactions
Enter Dr. Danielle Kimmel - chemistry master and high-school friend. When she heard of what I was trying - and failing - to accomplish with resin, she suggested trying a material she was familiar with from her days in science labs: PDMS.
Danielle Kimmel, PhD (right)
PDMS is an abbreviation for polydimethylsiloxane. It’s a silicone-based organic polymer - and it’s used in a LOT more than I realized. Cosmetics, perfumes, liquid dyes, cooking oils, water repellant coatings…even solar panels! Danielle explained to me that it’s made up of Hydrogen, Oxygen, Carbon and Silicon - all naturally-occurring elements that are fairly abundant in nature. It retains high optical clarity over time (hence its use as a coating in Solar Panels) which seems like good news for the stability of my finished art pieces. It isn’t biodegradable, however, unlike other resins formed by fossil fuels, it doesn’t have to be burned to be disposed of. It can be broken down using various natural clays. Overall, PDMS seems like a fascinating material with a seemingly-endless array of uses in the modern world. Its organic nature and the fact that it has no harmful effects on organisms and the environment make it seem like it could be another good possibility for this project - now I just have to test how it reacts with gum bichromate prints.
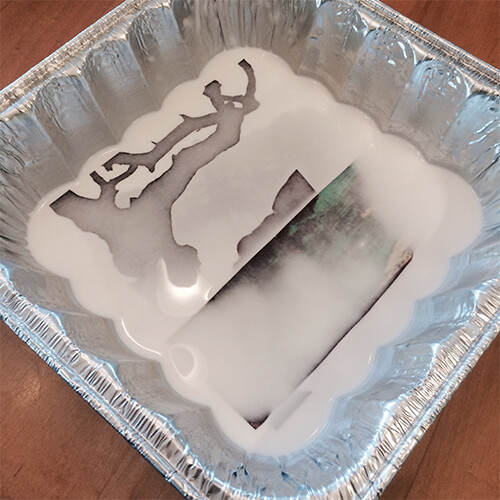
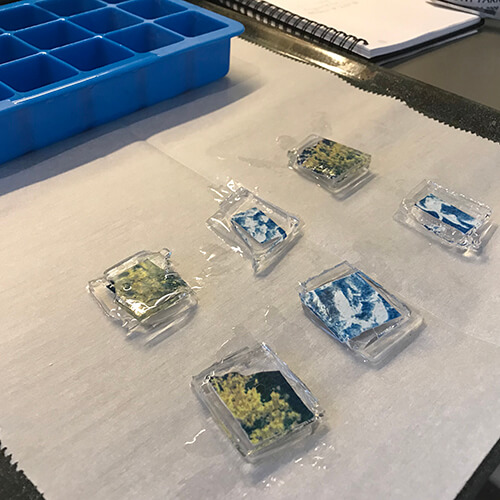
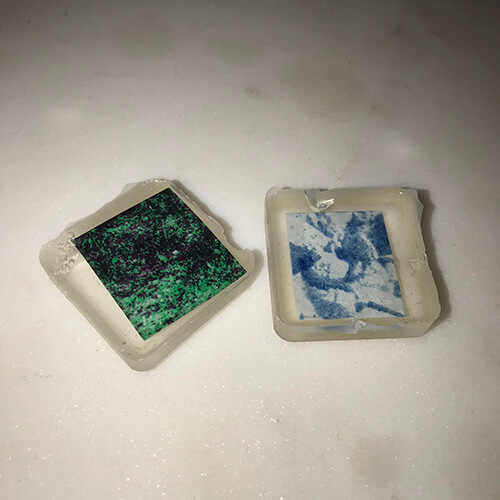
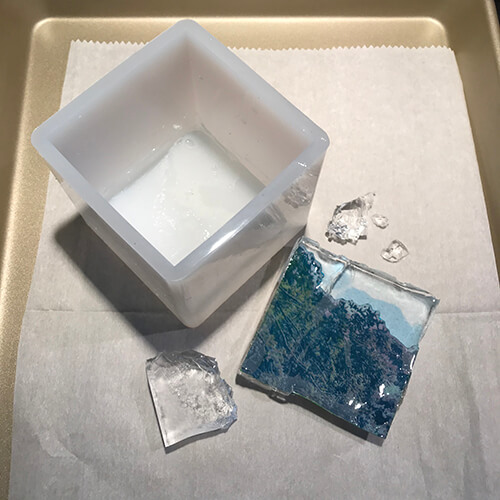
Danielle and I got together today to test some small samples of PDMS to see how it would interact with Gum Bichromate prints. I have plenty of scrap prints that aren’t good enough to be included in final landscape pieces - so I cut small squares of these prints and found some silicone ice cube trays to use as mini-molds for our testing. We didn’t seal any of the gum bichromate - just pasted them down on a layer of cured PDMS and poured more degassed PDMS on top of it. We then cured it by placing it in a 215° oven for 45 minutes.
My mind is completely blown! The PDMS cured perfectly clear and had no negative impact on the un-sealed Gum Bichromate print. It looked absolutely perfect. And it had taken less than an hour. The process was easier, the results were more consistent and at this rate, I could complete multiple poured layers in a single day. This is absolutely revolutionary and has completely reenergized me to work on this project!
Now I just have to figure out how to finance this rather pricey material. I’m going to look into art grants to see if there are any that would be interested in a science/art crossover. In the meantime - it’s back to making all new Gum Bichromate prints.
Artwork during a Global Pandemic
Summer-Fall 2020
Making Gum Bichromate prints has continued over the past year - and progress has been made in establishing the process that is going to take me to a finished product. In fact - I hope to have one finished piece by the end of 2020.
It would truly be a bittersweet year if that were the case. Making art…going about daily life…trying to establish what should be a priority during this pandemic has been a surreal experience. I feel more momentum now than I ever have since I have experienced some successes with this project - and yet the world feels more and more like a strange, sick, and - at times - a deeply selfish place. How do I fit into this world? What work can I do to ensure that I’m not embodying that selfishness? I know some answers already but these are the questions I will continue to reflect on in the hours that I’m alone in the darkroom. Art is not created in a vacuum and I’d be lying if I said the main focus of my attention over the past year has been landscapes. But despite the mixed feelings I have about finding joy in creating art right now, there has been significant process made…
CHALLENGE ONE: Shrinking Paper
I would have thought that by this point in the project that the printing process would be the easiest part but it still continues to surprise me. And not always in a good way. No matter what steps I take to pre-shrink my watercolor paper, it still seems to continue it’s shrinking process during the multiple exposures and rinse baths that are a part of using color-separated negatives.
I've tried:
treating large batches of paper in extremely hot water for a shorter period of time
leaving paper to soak for days in room temperature water
multiple shrink baths
And still, I’d find that some of my prints were shrinking so much in certain areas that the registration of the negatives was totally thrown off after awhile! The image would look crisp and clear in one area of the print - but blurry in another.
I thought I had done thorough research into Watercolor Paper shrinking. Then - quite by accident - I came across this profile of three-color Gum artist Keith Taylor by Lear Levin at Unblinking Eye. In it, Levin describes the process Taylor uses to avoid paper shrinking: dry-mounting his paper to a thin sheet of aluminum for the entire printing process. It was an amazing suggestion and one that I had never thought of! I already had a Heat Press sitting unused in my basement - it had been left behind as a darkroom-warming-gift by the artist that previously owned our house. So I invested in some Fusion 4000 and found a local metalworks to cut some aluminum to the exact size I needed.
Heatpress • Roll of Fusion 4000 • Paper mounted on aluminum
I tested the process and figured out the best way to mount the paper to the metal, made an exposure, left it to dry, and held my breath. When I laid the next negative on top of the dry print - it lined up perfectly! I feel confident that this has solved my paper shrinking and negative registration problems!
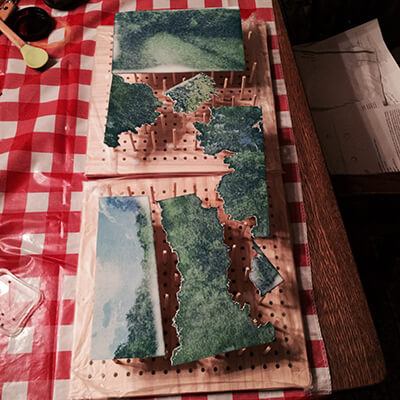
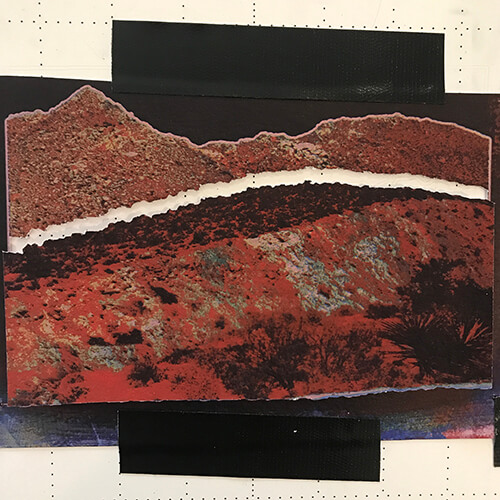
CHALLENGE TWO: Cutting out the Finished Prints
Once I have all of the necessary prints made for a finished piece - a new challenge presents itself. What is the best way to cut out all of the individual trees, bushes, rocks, etc. in order to layer them in encapsulant? In my previous resin tests, I was using a needle to poke around each individual item, but it was time consuming and gave more of a perforated-edge effect that I wasn’t in love with. I tried using a scalpel but it was hard to get fine detail or cut curved shapes. I explored using cutting attachments with a Dremel drill, but that ended up tearing the paper instead of cutting it. I wanted something more precise so I started exploring cutting machines.
Dremel Test
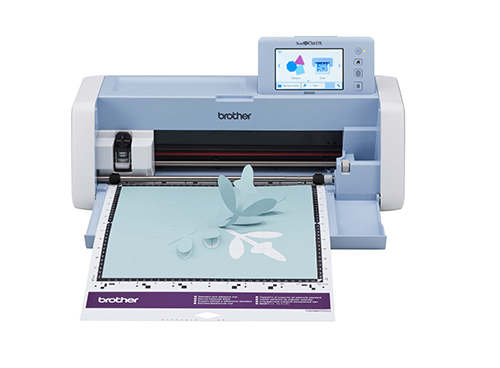
I tried two different machines, the Silhouette Cameo and the Brother Scan n’ Cut and the clear winner is:
Brother Scan N Cut SDX225
I was able to find a gently used Scan n’ Cut floor model at a Vacuum and Sewing Machine Shop in Indiana for a fantastic deal. It was money well spent because this machine works like a charm. I simply tape the print down securely, use the machine to scan the print, then use Brother’s software to tell the machine exactly where to cut. As long as I don’t touch or move the scanned print in the meantime, the machine can suck the print back up and do the cutting part. The edges are crisp and look fantastic.
CHALLENGE THREE: Finding QSIL216 and Embedding the Prints
I’m convinced that PDMS in general is still the right material in which to embed my prints. However trying to find the right one has been a journey. Danielle and I tested Sylgard 184 - and it was a wonderful product - but upon further research, I have found that Dow is a company that has a troubled history with environmental impact. In the end I have decided to go with a type of PDMS called QSIL 216 made by Quantum Silicones: one of the most popular products for coating Solar Panels.
But there was still a lot of questions: At what temperature should I cure the QSIL? Will it bleed into the paper? Do I need to use the degassing chamber? How much do I need to mix up in order to get the layer depth that I desire?
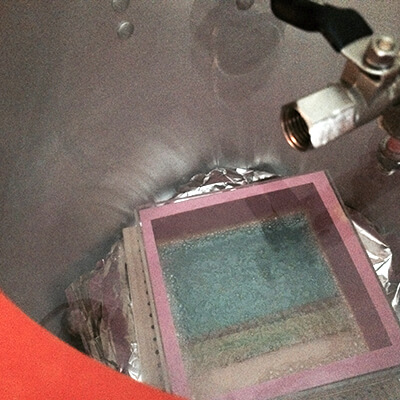
There was a lot of trial and error. I was able to work out the oven temperature (170°F) and curing time (10-20 minutes). And the degassing chamber is ALWAYS a good idea - especially right after mixing.
Time Lapse: QSIL 216 in a Vacuum Chamber
As far as the layer depth - that’s a bit more complicated. I found that QSIL does in fact have the ability to leech into the print paper - but only if it is left for a longer time without curing. So I’m going to employ a strategy of “embedding layers” and “spacer layers”. When the time comes to embed a section of print - I will glue the print down and then pour an extremely thin layer of QSIL over the print. Just enough to barely cover it. It’ll make the degassing and any bubble removal go faster so I can get the print into the oven to cure as quickly as possible. Then I can take my time with the thicker spacer layers and not feel rushed when it comes to removing the bubbles.
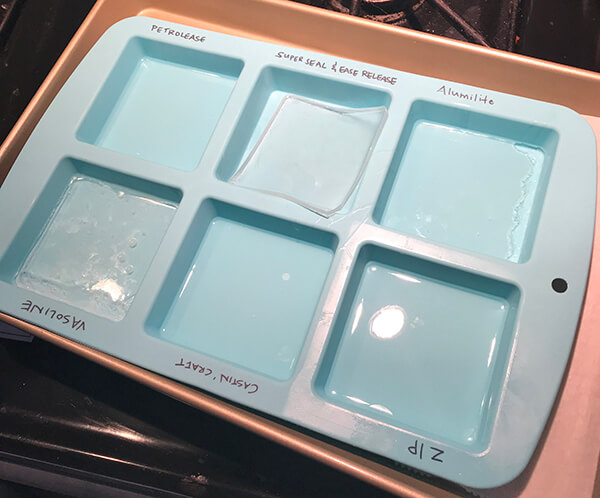
But the main struggle with this product was removing my tests from their silicone molds. The QSIL 216 completely and totally fused with the silicone mold. There was no removing it - at least not in one piece.
So a mold release was needed - but which one? In the end it took 6 tries, but I finally found a combination that works: Super Seal and Ease Release 2000.
Super Seal/Ease Release 2000 beats out Zip, Castin' Craft, Alumilite, Petrolease and Vasoline.
Now - after eight years - I feel like I know how to do everything for this project.